Program details

1. Preprocessing
| Option | Description |
|---|---|
| -v [ --visualize ] | Show points accumulation process |
| -a [ --auto_topic ] | Select image/camera_info/points topics automatically |
| -d [ --dynamic_lidar_integration ] | Create target point clouds from dynamic LiDAR data (for velodyne-like LiDARs) |
| -i [ --intensity_channel ] | "auto" or point intensity channel name |
| --camera_info_topic | CameraInfo topic name |
| --image_topic | Image topic name |
| --points_topic | PointCloud2 topic name |
| --camera_model | auto, atan, plumb_bob, fisheye, omnidir, or equirectangular |
| --camera_intrinsic | Camera intrinsic parameters: fx,fy,cx,cy(,xi) (Don't put spaces between values) |
| --camera_distortion_coeffs | Camera distortion parameters [k1,k2,p1,p2,k3] (Don't put spaces between values) |
| --voxel_resolution | Downsampling resolution |
| --min_distance | Minimum point distance. Points closer than this value will be discarded |
Example1: Automatically select image/camera_info/points topics and use the dynamic point integrator for an Ouster LiDAR
# -a = Automatic topic selection
# -d = Dynamic points integration
# -v = Visualization
$ ros2 run direct_visual_lidar_calibration preprocess ouster_pinhole ouster_pinhole_preprocessed -a -d -v
Note
Automatic topic selection requires each rosbag to contain single image/camera_info/points topics.
Note
distortion_model of the camera_info msg must be plumb_bob or fisheye. For other distortion models, specify the camera model name and parameters manually as in Example2.
Example2: Manually specify image/points topics and camera parameters
$ ros2 run direct_visual_lidar_calibration preprocess ouster_pinhole ouster_pinhole_preprocessed \
  --image_topic /camera/image \
  --points_topic /os_cloud_node/points \
  --camera_model plumb_bob \
  --camera_intrinsics 810.38,810.28,822.84,622.47
  --camera_distortion_coeffs
2. Initial guess
Option1: Manual estimation
- Right click a 3D point on the point cloud and a corresponding 2D point on the image
- Click
Add picked pointsbutton - Repeat 1 and 2 for several points (At least three points. The more the better.)
- Click
Estimatebutton to obtain an initial guess of the LiDAR-camera transformation - Check if the image projection result is fine by changing
blend_weight - Click
Savebutton to save the initial guess
Option2: Automatic estimation
Warning
SuperGlue is not allowed to be used for commercial purposes!!
$ ros2 run direct_visual_lidar_calibration find_matches_superglue.py preprocessed_data_path
$ ros2 run direct_visual_lidar_calibration initial_guess_auto preprocessed_data_path
Note
SuperGlue requires the upward directions of camera and LiDAR images are roughly aligned. Use --rotate_camera and --rotate_lidar options to ensure this. (e.g., --rotate_camera 90. Only 90, 180, and 270 degree rotations are allowed.)
Note
You can find *_superglue.png saved in the data directory that represents detected 2D-3D correspondences.

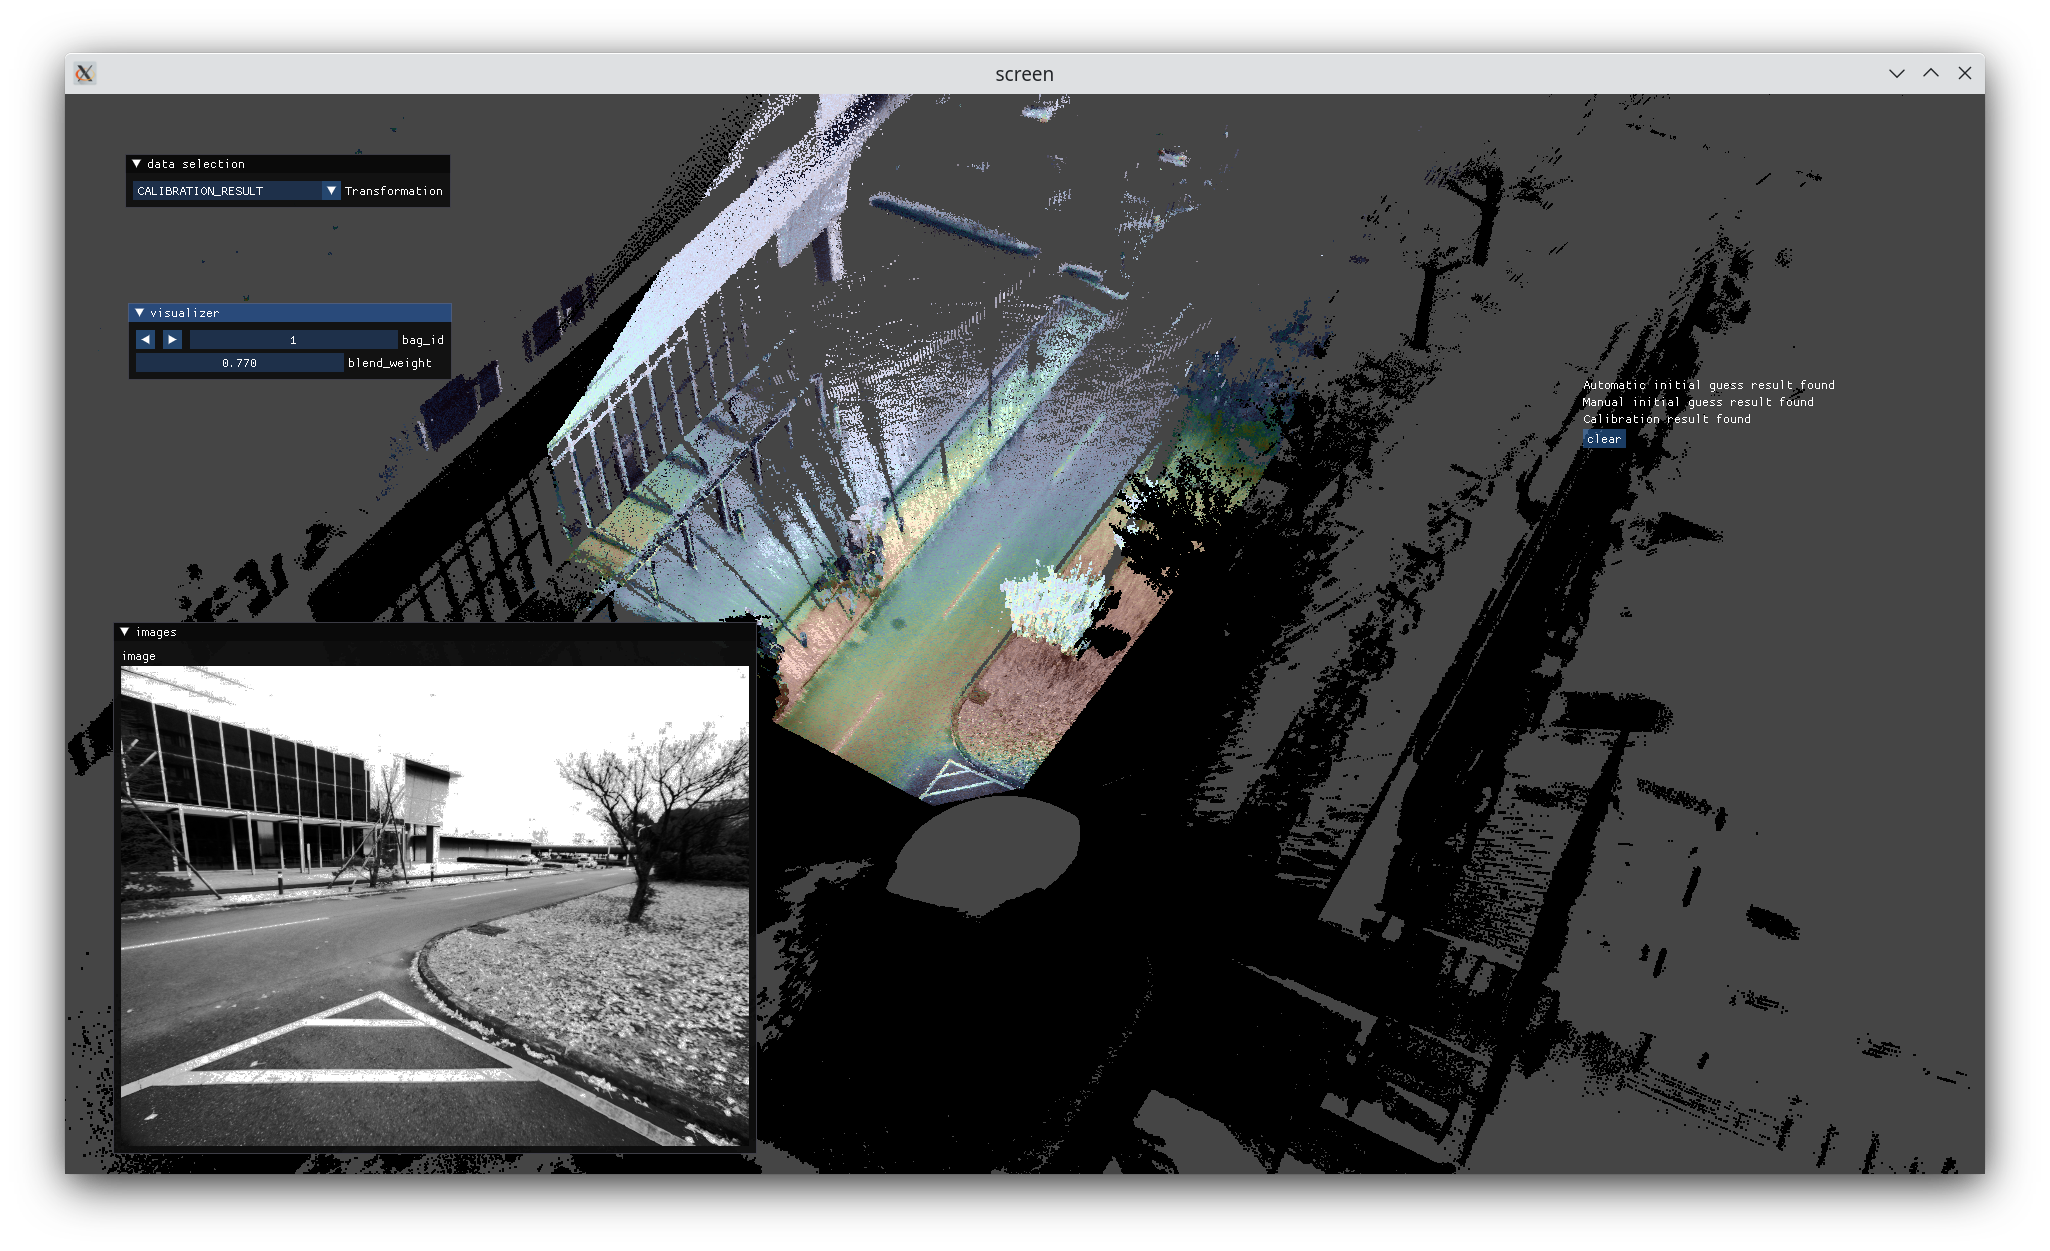
3. Calibration
| Option | Description |
|---|---|
| --registration_type (default = nid_bfgs) | nid_bfgs or nid_nelder_mead |
| --nid_bins (default = 16) | Number of histogram bins for NID |
| --nelder_mead_init_step (default = 0.001) | Nelder-mead initial step size |
| --nelder_mead_convergence_criteria (default = 1e-8) | Nelder-mead convergence criteria |
| --auto_quit | Automatically close the viewer after calibration |
| --background | Disable visualization |
Once the calibration is completed, open calib.json in the data directory with a text editor and find the calibration result T_lidar_camera: [x, y, z, qx, qy, qz, qw] that transforms a 3D point in the camera frame into the LiDAR frame (i.e., p_lidar = T_lidar_camera * p_camera).
calib.json also contains camera parameters, manual/automatic initial guess results (init_T_lidar_camera and init_T_lidar_camera_auto), and some meta data.
calib.json example
{
  "camera": {
    "camera_model": "plumb_bob",
    "distortion_coeffs": [
      -0.0408800300227048,
      0.08232065129613146,
      0.0001524417339184569,
      -0.0002905086459989649,
      -0.03955344846871078
    ],
    "intrinsics": [
      810.3829359698531,
      810.2790141092258,
      822.8441591172331,
      622.4745298743934
    ]
  },
  "meta": {
    "bag_names": [
      "rosbag2_2022_12_09-11_51_00",
      "rosbag2_2022_12_09-11_51_39",
      "rosbag2_2022_12_09-11_52_13",
      "rosbag2_2022_12_09-11_52_50",
      "rosbag2_2022_12_09-11_53_36"
    ],
    "camera_info_topic": "/drone01/camera_info",
    "data_path": "ouster_pinhole",
    "image_topic": "/drone01/image/compressed",
    "intensity_channel": "reflectivity",
    "points_topic": "/drone01/points"
  },
  "results": {
    "T_lidar_camera": [
      0.029965406350829532,
      0.0018510163746144406,
      0.10836834957603067,
      -0.5020970411416648,
      0.49250979122625377,
      -0.5009468032383634,
      0.5043659060130069
    ],
    "init_T_lidar_camera": [
      0.22754979133605957,
      0.14180368185043335,
      0.09482517838478088,
      -0.4999842630484326,
      0.4931746122747289,
      -0.5037605589800136,
      0.5030107918869041
    ],
    "init_T_lidar_camera_auto": [
      -0.06012828990854561,
      0.03957544424313349,
      0.09638527740996672,
      -0.5015219498041896,
      0.4932277405168562,
      -0.5021955602061449,
      0.5029927923524125
    ]
  }
}
Tip
If you need the transformation in another form (e.g., 4x4 matrix), use the Matrix converter.
4. Result inspection